Digital Art Games Animation Rigging Unity Maya
Character Rigging and Animation Workflow for Unity in Maya
· 3 Minutes / 857 Words
This article highlights pitfalls I’ve come across while animating a character in Autodesk Maya. They often surface when you export your model to .fbx format for real-time applications such as Unity. Learn from my mistakes and read the following sections on rigging, animating and exporting.
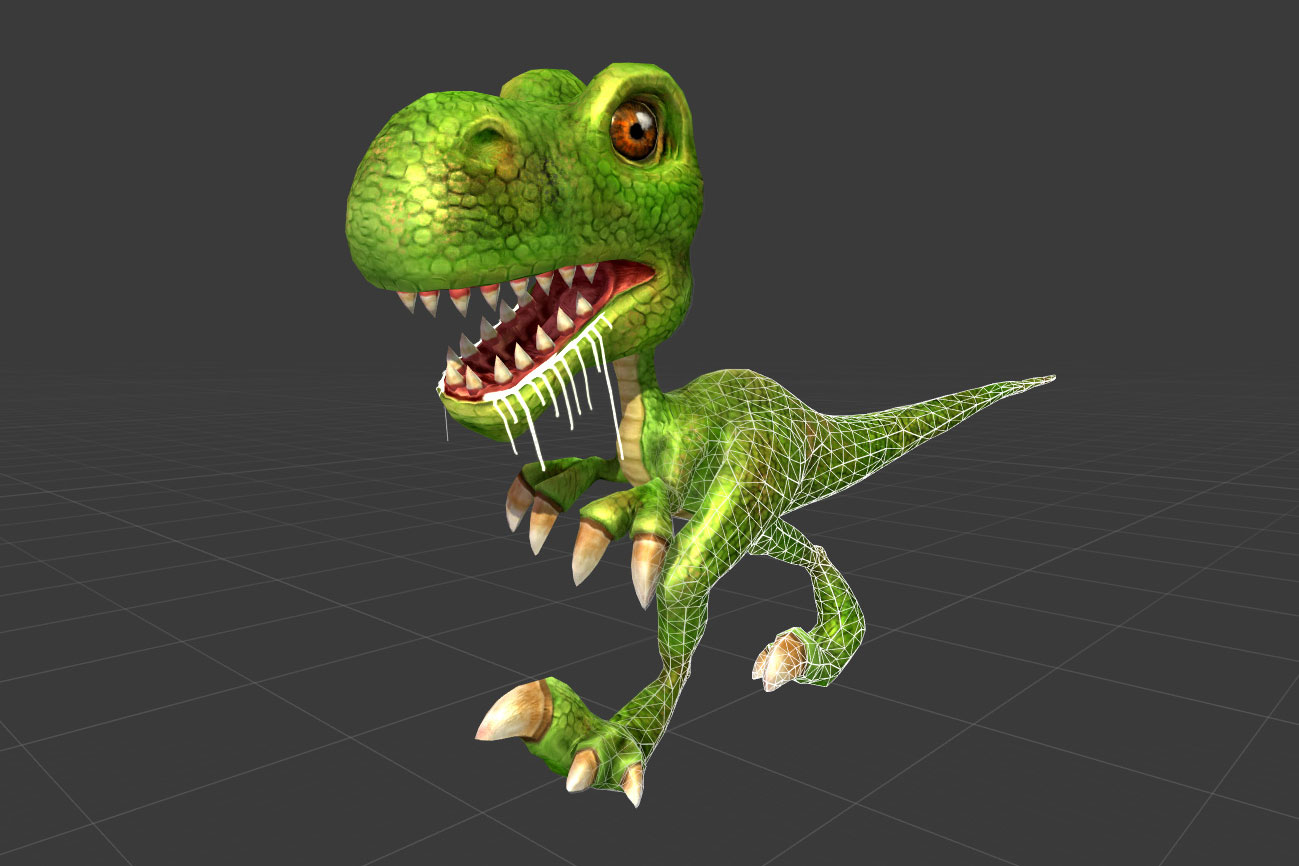
I talk about specific problems I had when creating my cartoon velociraptor. The following rendering from the Unity viewport shows you the creature referred to in the examples.
Rigging
The majority of real-time applications support
- transform animation,
- skeleton-based animation
- and morph targets, known as Blend Shapes in Maya.
You should set at most four influences when skinning via Bind Smooth Skin. This is the highest number of influences Unity can handle. Sketchfab and other applications might handle less or more, but you’re generally safe if you use four influences.
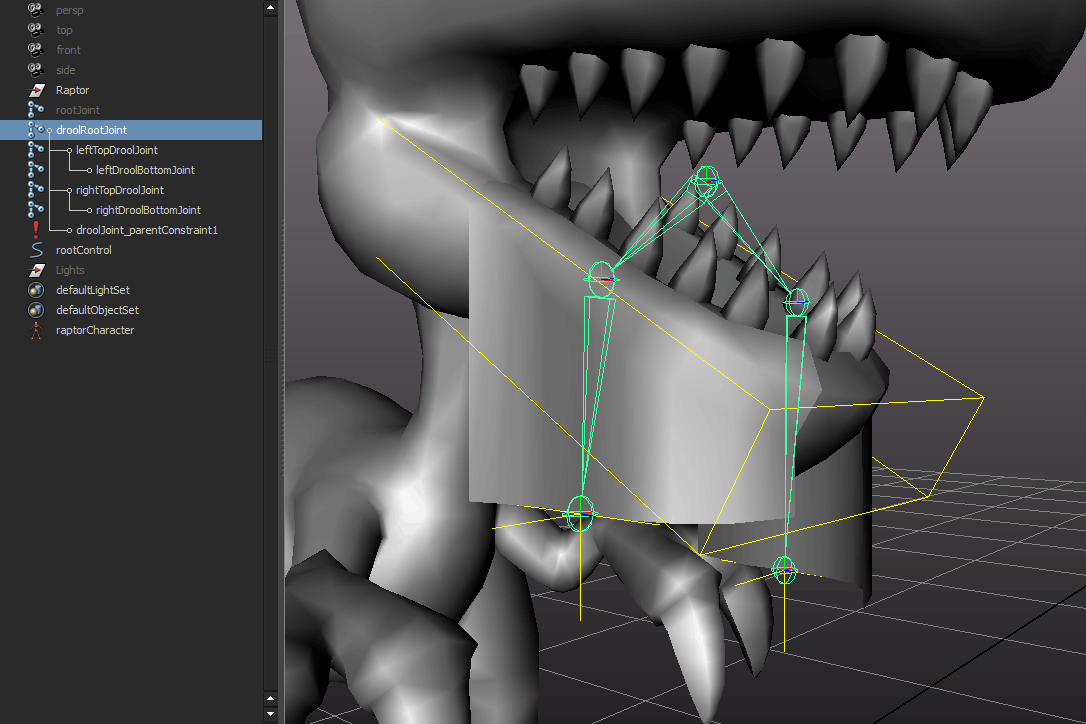
If you use constraints and deformers specific to a certain application you have to make sure that the exporter understands them. They can pose a problem when baking the animation. I had not considered that and created parts of the velociraptor rig with Cluster deformers.
The drool mesh is parented to the lower jaw controller. However, the bottom vertices of the drool meshes were members of two Clusters. This information does not get baked during the .fbx export. I had learned this fact only after animating the walk cycle. Then I had to redo this part of the rig with joints, transferring the animation.
You don’t have to flimsily paint your weights, if you didn’t know. With the help of the Component Editor you are able to precisely set your skin weights.
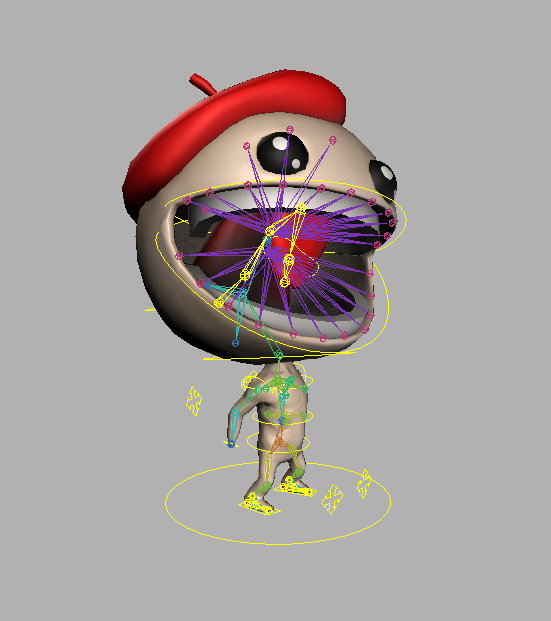
So I had learned to stick to joints, even for more complex animations and squash and stretch effects. Take for example this small character with the large head and beret. His mouth can be shrunk and grown for an exaggerated animation, all achieved with joints.
Animating
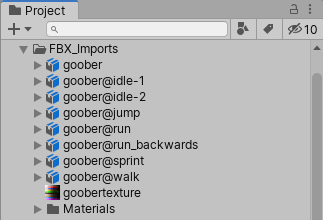
If your model has many animations you can create files in the format [email protected] or [email protected]. Unity then imports all four files and collects the animation clips.
However, you achieve a better animation workflow if you include all your takes in the same .fbx file. Plus, you get compatibility with Sketchfab. Why?
- Unity won’t pollute your workspace with animation files.
- You don’t have to switch between several Maya instances, which can be daunting for your computer. The alternative is to open another file each time you want to tweak an animation, which is frustrating.
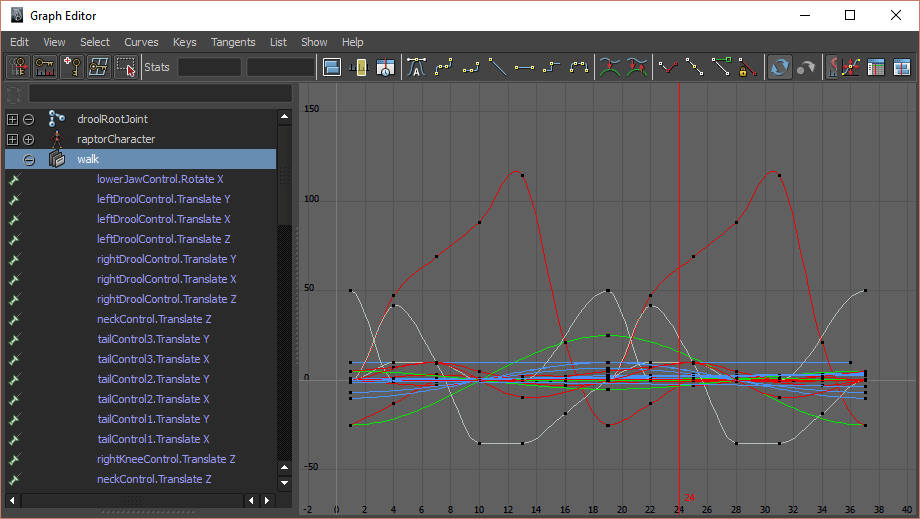
You can manage your animation clips in the Trax Editor. The feature has long been available in Maya, but was somehow missing from Maya LT. Luckily, Autodesk introduced the Time Editor in Maya 2017. It serves a similar purpose and has made its way to Maya LT.
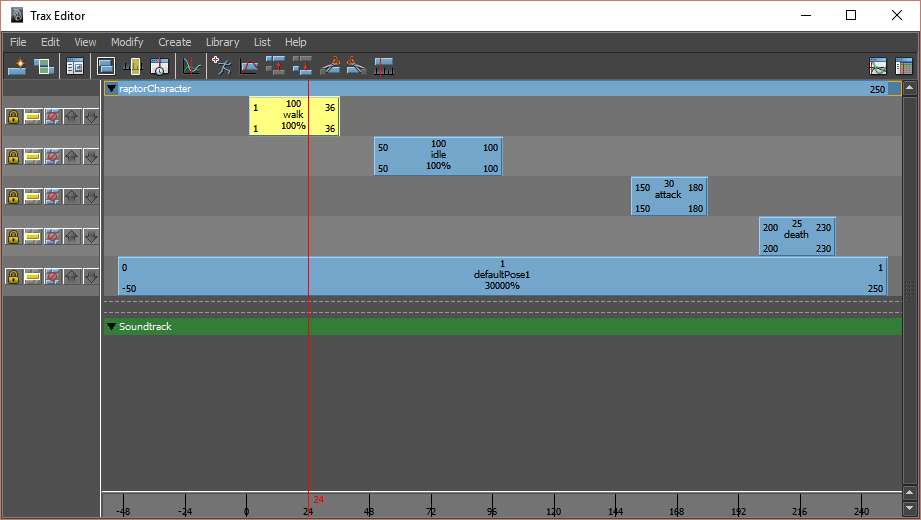
Each clip holds the animation curves for a specific animation. You have to activate or deactivate a clip to see key ticks in the timeline and curves in the graph editor. Keys from other animation are hidden, allowing you to concentrate on your task. You can use pre and post infinity cycles as you don’t have to reset your rig between animations, polluting your scene with curves and keys. This allows for a clean and pleasant animation experience.
Exporting
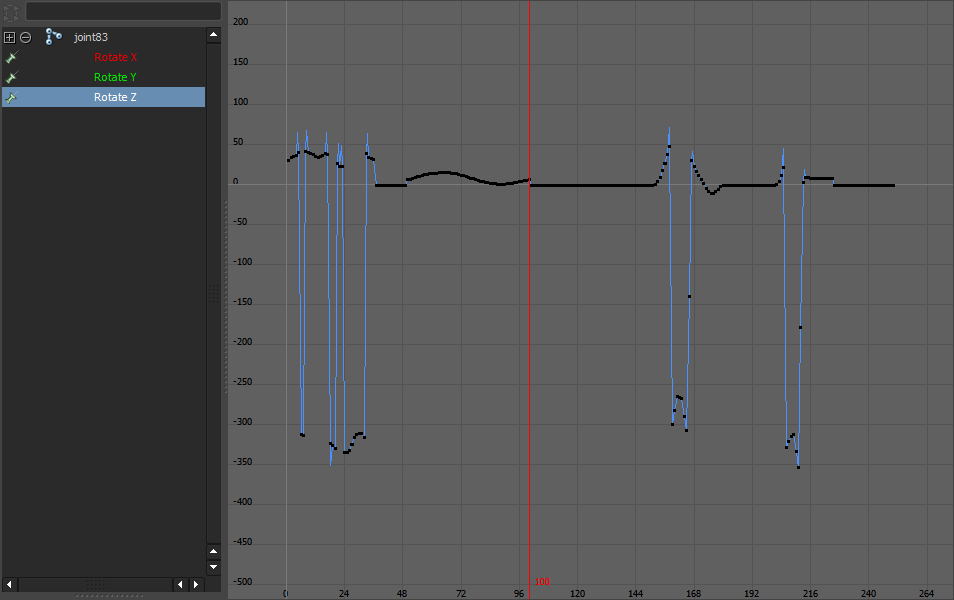
Exporting your animations to .fbx can yield all sorts of problems, especially if your are stuck with older versions of Maya. Each time I had exported the raptor with the .fbx exporter in Maya 2012 I experienced issues. The exporter had problems resampling as Euler interpolations when baking the animation. This lead to animation glitches in Sketchfab, like jerking and twitching raptor hands. Unity can usually cleanup these curves, but you shouldn’t count on it.
I started cleaning the curves by hand, before getting a chance to use Maya LT 2017. This allowed me to use the updated .fbx exporter, which handles rotations without problems. Which is where I’ve also discovered the Game Exporter feature, a tool I can only recommend. It allows you to specify the key ranges for your clips.
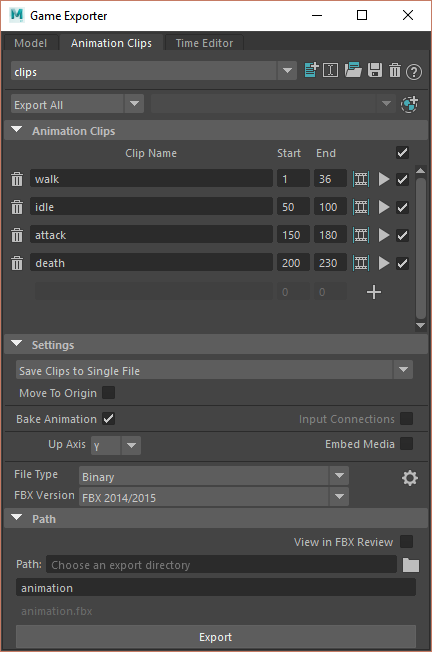
If you click on the cog wheel in the lower right corner you’ll open the usual .fbx settings. These haven’t changed much since the first .fbx exporters, so the usual settings apply. You should check Bake Animation, Resample All, as well as Deformed Models and Skins. Given you don’t want to study the advanced settings uncheck everything else. Your animations will still work.
As soon as the export was successful I’ve uploaded the raptor to Sketchfab. It imported the clip ranges set in the Game Exporter and the animations look great. If you want to use the cartoon veliraptor for your game head over to CGTrader.
I hope a few of these findings are helpful to you. Have you had similar or different problems with your rigs and animations? If so, please leave a comment with your tips. Also, if you have a problem with one of your rigs please feel free to ask, I’ll be glad to help.
If you liked this article, please consider sharing it with your followers.