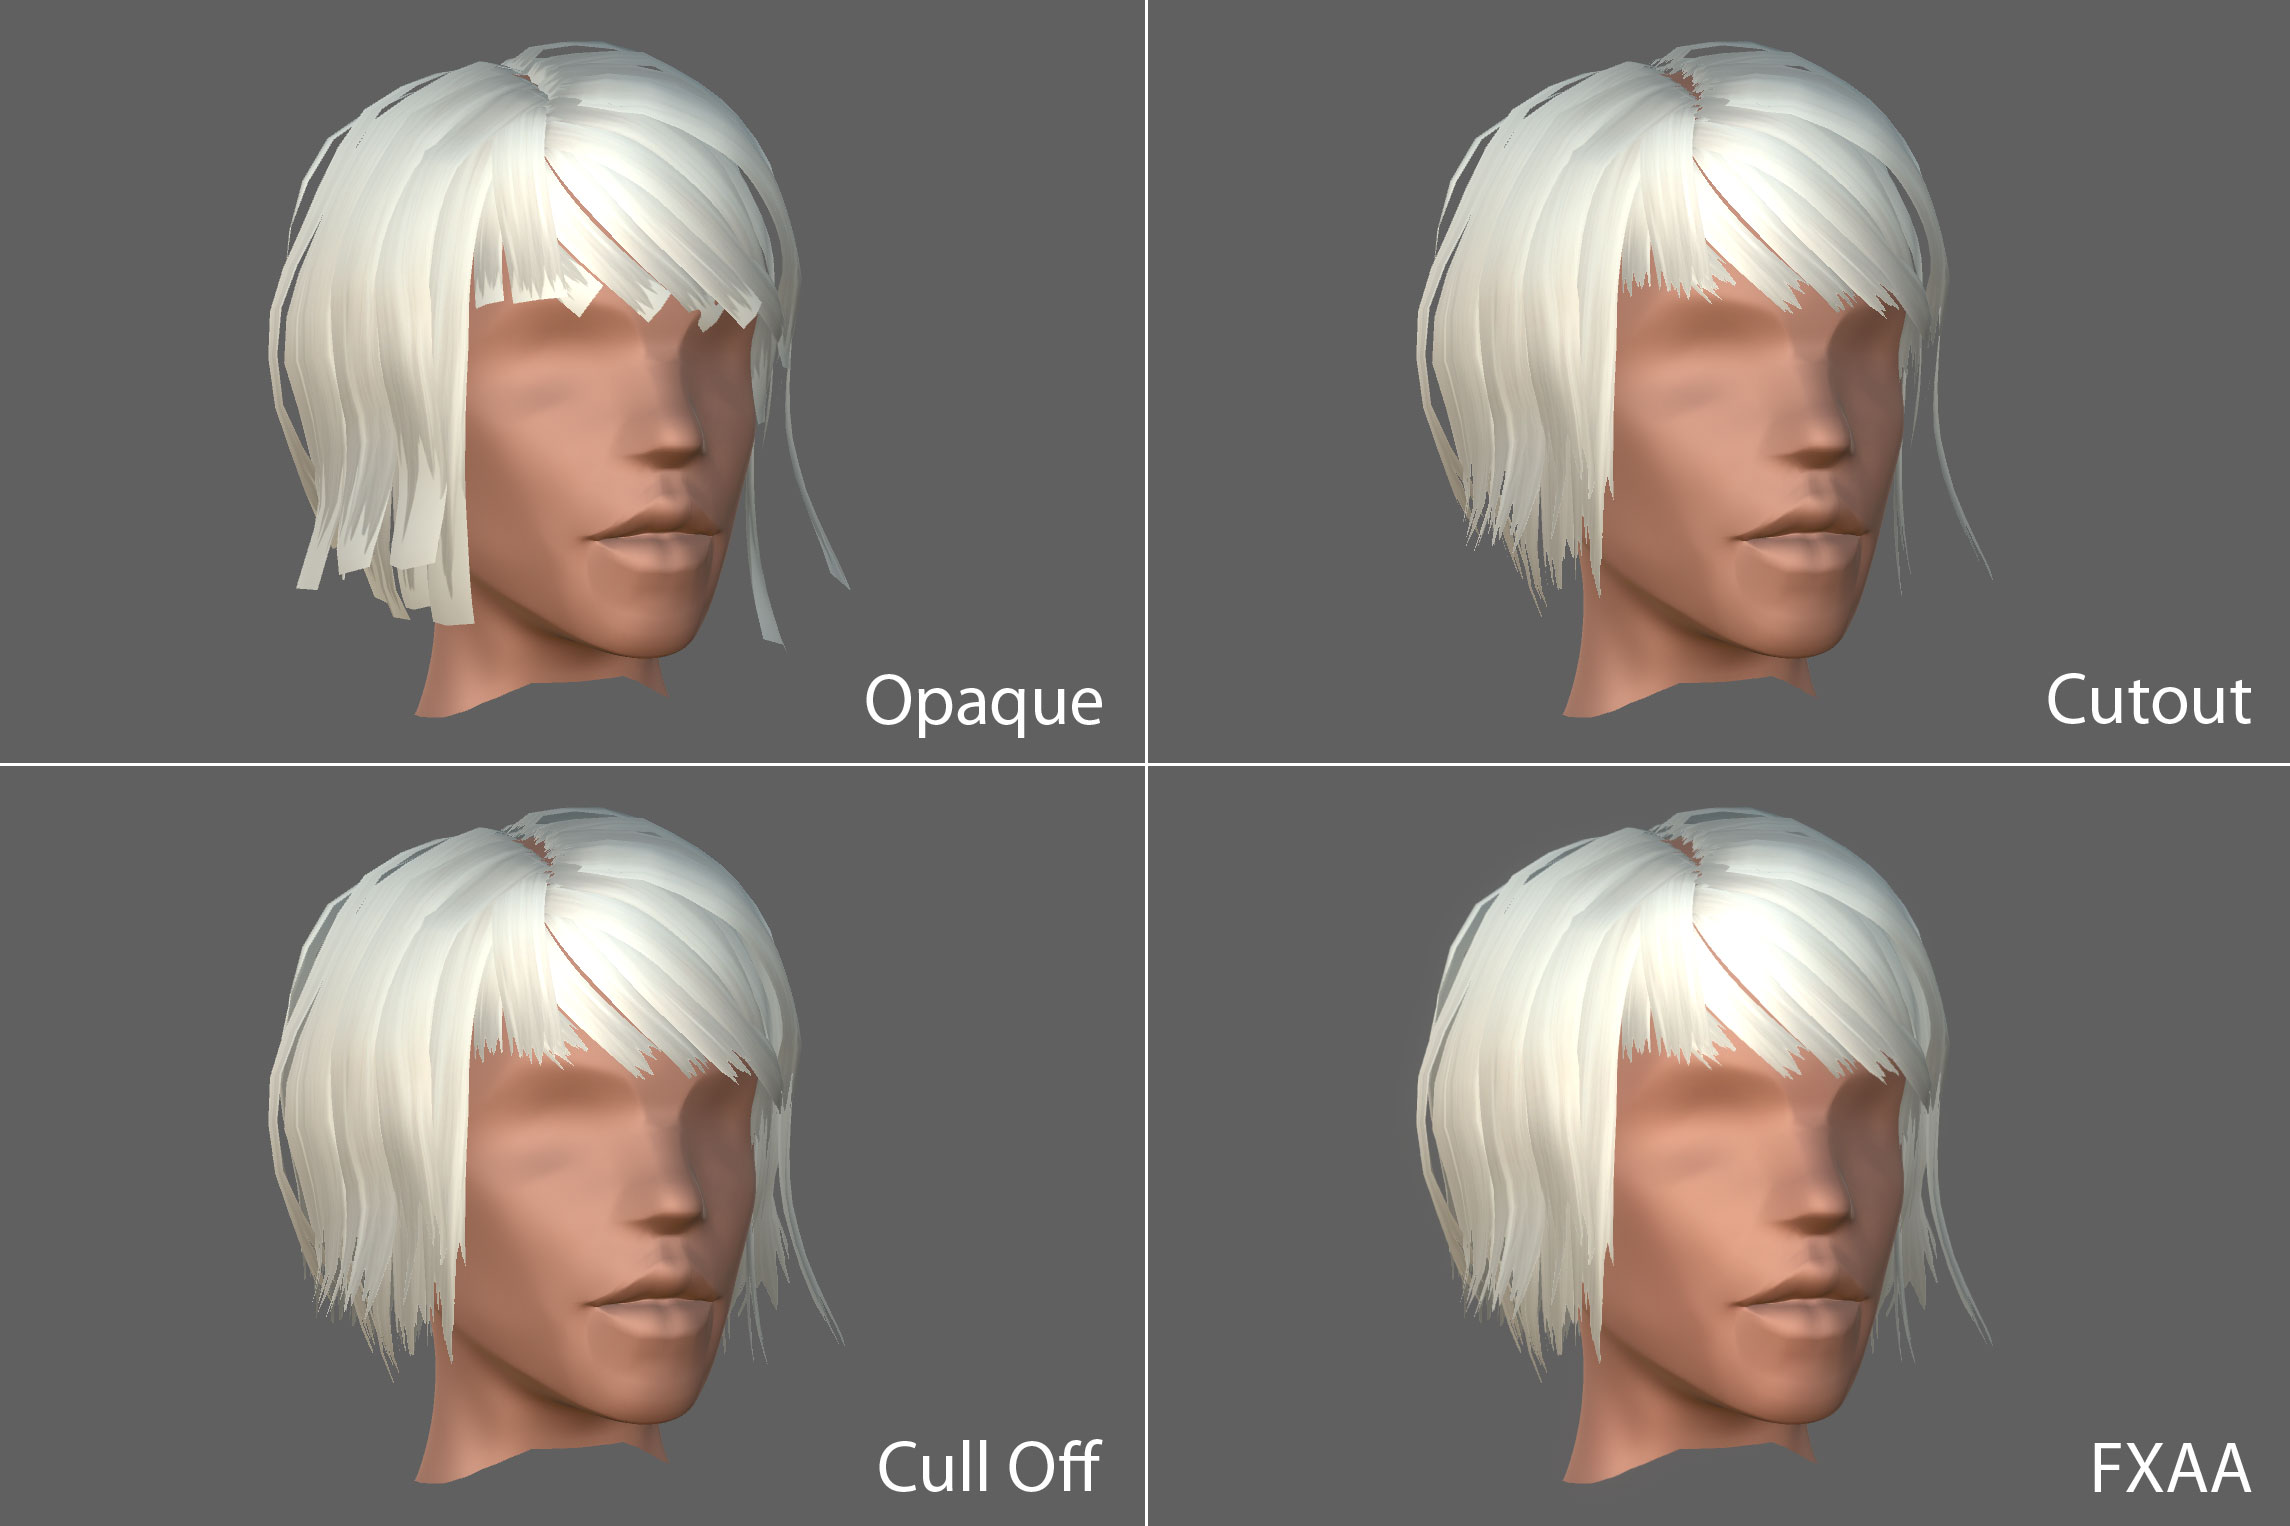
This article leads you through my experience a few weeks ago. Let’s say you have modeled and textured hair for your low-poly character and want to drop it into Unity. After importing your mesh you play with the different rendering modes of the default material and come to the conclusion that they all give you unsatisfactory results. You then settle on the Cutout rendering mode and cringe while noticing the backface culling, causing most of your hair mesh to disappear.

Turns out, that Unity has no alpha test with soft edges or a double-sided shader per default, apart from the foliage shaders. There is no well-hidden checkbox to turn off backface culling, like one might expect coming from a modeling software. Luckily all the default shaders can be downloaded from the Unity Download Archive to tinker with them.
Modifying the Standard Shader for Double-Sided Rendering
There are many files in this package. To find the standard shader you have to locate the Standard.shader file in the DefaultResourcesExtra folder. The shader itself consists of two subshaders, made up of five and four passes respectively. You can get a clear overview by collapsing the code blocks.
Shader "Standard" {

    Properties { ... }

    SubShader {
        LOD 300

        // ------------------------------------------------------------------
        //  Base forward pass (directional light, emission, lightmaps, ...)
        Pass { ... }

        // ------------------------------------------------------------------
        //  Additive forward pass (one light per pass)
        Pass { ... }

        // ------------------------------------------------------------------
        //  Shadow rendering pass
        Pass { ... }

        // ------------------------------------------------------------------
        //  Deferred pass
        Pass { ... }

        // ------------------------------------------------------------------
        // Extracts information for lightmapping, GI (emission, albedo, ...)
        // This pass it not used during regular rendering.
        Pass { ... }
    }

    SubShader {
        LOD 150

        // ------------------------------------------------------------------
        //  Base forward pass (directional light, emission, lightmaps, ...)
        Pass { ... }

        // ------------------------------------------------------------------
        //  Additive forward pass (one light per pass)
        Pass { ... }

        // ------------------------------------------------------------------
        //  Shadow rendering pass
        Pass  { ... }

        // ------------------------------------------------------------------
        // Extracts information for lightmapping, GI (emission, albedo, ...)
        // This pass it not used during regular rendering.
        Pass { ... }
    }

}
The subshaders are essentially the same, but the second one can be used on weaker hardware, as indicated by the LOD 150 line. The only difference is that the deferred pass is missing in the second subshader.
If you look at one of the passes you can see a Cg snippet with #pragma and #include commands. At first the pass seems simple, but the real magic happens in the included UnityStandardCoreForward.cginc file, which itself includes between 350 and almost 700 lines.
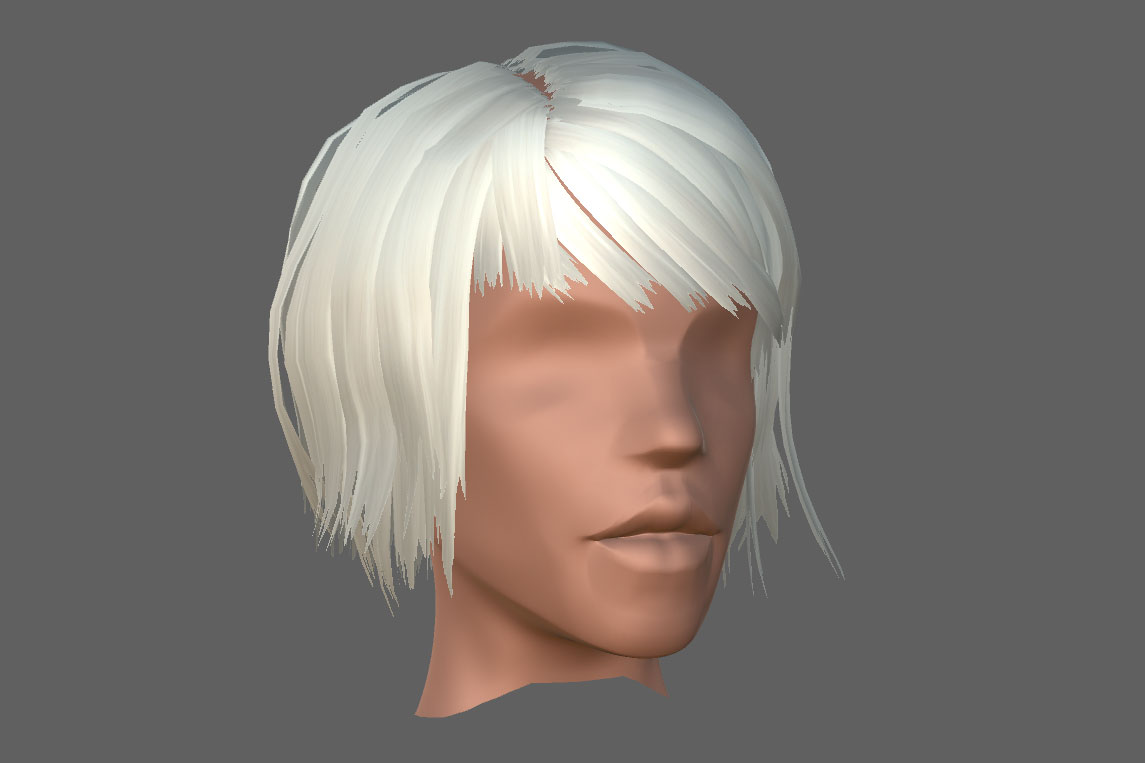
The commands before the Cg snippet (CGPROGRAM until ENDCG) set up the rendering pass. This is where you can turn backface culling off via the command Cull Off. You can do this for each pass, which gives you a result similar to the image below.
Pass {
    Name "FORWARD"
    Tags { "LightMode" = "ForwardBase" }

    Blend [_SrcBlend] [_DstBlend]
    ZWrite [_ZWrite]

    Cull Off // This turns of backface culling for this pass.

    CGPROGRAM
    #pragma target 3.0
    #pragma exclude_renderers gles

    #pragma shader_feature _NORMALMAP
    #pragma shader_feature _ _ALPHATEST_ON _ALPHABLEND_ON _ALPHAPREMULTIPLY_ON
    #pragma shader_feature _EMISSION
    #pragma shader_feature _METALLICGLOSSMAP
    #pragma shader_feature __ _DETAIL_MULX2
    #pragma shader_feature _PARALLAXMAP

    #pragma multi_compile_fwdbase
    #pragma multi_compile_fog

    #pragma vertex vertBase
    #pragma fragment fragBase
    #include "UnityStandardCoreForward.cginc"

    ENDCG
}
The Lighting Is Wrong in This Approach
The lighting of the backfaces is wrong, as the normals of the mesh are facing away from the camera. This is because Unity does not automatically flip the normals for you like a modeling software does. You would have to create an additional pass where you duplicate and invert the faces yourself. This means twice as many draw calls for a double-sided shader. Which is why Unity’s Daniel Brauer suggests to copy and invert the faces of your mesh in your modeling software, instead of using a double-sided shader.
Even if draw calls aren’t a problem, you’re still creating new shaders to render certain meshes in a way that doesn’t actually look different. Having a double-sided version of each shader you want to use for your single-sided objects means you waste the GPU’s time with state changes and shader compilation.
I have decided to accept the wrong lighting, as it is hardly noticeable on the hair of my stylized character. I also plan on applying a cloth simulation later, which gets more expensive when I duplicate my mesh.
If you still want to use a double-sided shader I recommend having a look at double-sided rendering methods.
Softening the Alpha Cutoff with Fast Approximate Anti-Aliasing
Unity offers many image effects in the Effects package of its Standard Assets. Among them are several anti-aliasing algorithms you can add as a component to your camera. I have used fast approximate anti-aliasing to soften the alpha test of the cutout rendering mode. It is not really noticeable in the image below but makes a huge difference when the camera or the hair is moving.

Creating Low-Poly Hair Strips in ZBrush
You may wonder how the hair itself was modeled. It consists of several hair strips carefully laid out with a custom brush and the curve stroke feature in ZBrush. You can build your own hair strip brush following the tutorial by Tom Parker or just download my hair strip brush, if you are in a hurry.
Conclusion
Unity provides a Cutout rendering mode with hard edges between opaque and transparent areas. The edges can be somewhat softened by using an image-based anti-aliasing method like FXAA. Backface culling can be deactivated by modifying an existing shader, but an additional pass is needed for correct lighting. Duplicating and inverting the mesh may be the fastest option in most cases.
For the time being I will use the simple approach outlined in this article. This allows me to try a cloth simulation later on. As I continue working on my character I am going to document my insights. Please let me know, if this article has made things clearer for you or if you have thoughts about my approach.